Continuous Scp Copying a File as It is Created
Jul 05, 2022
Edward S. & Jordana A.
5min Read
How to Use SCP Command for File Transfer
SCP (secure copy protocol) is a network file transfer protocol that enables easy and secure file transfers between a remote system and a local host or two remote locations. It uses the Secure Shell (SSH) mechanism to provide authentication and encryption features for your data and credentials.
Administrators use the SCP Linux command to streamline the data transfer process between Linux servers as it doesn't require any logging in into a server. Furthermore, it offers better security than the File Transfer Protocol (FTP) and complies with PCI Security Council Standards.
Download Complete Linux Commands Cheat Sheet
In this article, you'll learn how to use SCP commands on a remote host, such as a VPS. We will break down the basic SCP command and provide examples to help you better understand how Linux commands work.
Understanding SCP SSH Command Syntax
The basic syntax of the SCP command to perform a file transfer between two remote systems looks as follows:
scp [other options] [source username@IP]:/[directory and file name] [destination username@IP]:/[destination directory]
Here's a breakdown of the command:
- [other options] ‒ modifiers you can add to the SCP command. We'll cover the most popular ones later.
- [source username@IP] ‒ username and IP of the machine that hosts the target file.
- :/ ‒ informs the SCP command that the user will type in the source directory.
- [directory and file name] ‒ the file's location and name.
- [destination username@IP] ‒ username and IP of the destination system.
- [destination directory] ‒ the destination directory where the file will be saved.
The following example shows the SCP command in a real-world scenario:
scp -p root@162.168.1.1:/media/scp.png hostinger@162.168.1.2:/desktop/destination
If you're copying to or from a local host, you won't need the IP address and the destination or source path like /desktop/folder_name.
Pro Tip
Use the -r option to recursively copy entire directories.
Copying Files Using the SCP Command
The best thing about SCP is that it lets you securely transfer files between two remote hosts or a remote machine and a local system. The following sections will cover how SCP commands work for each type of transfer.
Important! Regardless of the type of transfer you perform with SCP, you shouldn't be connected to the remote server via SSH.
Copying From a Local Server to a Remote Host
We'll copy a local file scp.zip to a remote server called root. The server's IP address comes after the username.
scp /users/Hostinger/desktop/scp.zip root@191.162.0.2:/writing/article
If you do not have automatic SSH client confirmation set up, you will be prompted to enter the remote machine's user password and see a progress meter. It will look as follows:
root@191.162.0.2's password:
novel3.zip 100% 0 0.0KB/s 00:00

Let's say the remote server is set to listen for SSH connections on a port other than the default SSH port 22. In this case, you will have to specify that port using the -P option.
scp -P 2322 /users/Hostinger/desktop/scp.zip root@191.162.0.2:/writing/article
If you also want to change the name of the file during the transfer operation, then your command will look like this (if you don't use the default port, add –P followed by the appropriate port number):
scp /users/Hostinger/desktop/scp.zip root@191.162.0.2:/writing/article/howtoscp.zip
Use the –r option followed by the same command line to copy a directory with multiple files or subdirectories.
scp -r /users/Hostinger/desktop root@191.162.0.2:/writing/article
Pro Tip
To find a directory's full path, navigate to the appropriate directory and use the pwd SSH command (print working directory).
Transferring a Remote File to a Local Machine
Reversing the source and target systems of the command must be reflected in the syntax. This time, we will copy the scp.zip file from the same remote host to our local computer.
scp root@191.162.0.2:/writing/articles/SCP.zip Users/Hostinger/Desktop
Executing this command will prompt the same SSH login output requiring a password. It won't appear only if sudo privileges have disabled authentication or forced the SSH client to use a private key on your machine.
Safely Moving a File Between Remote Hosts
To copy files from one remote server to another, you will have to enter the passwords for both accounts after running the following command in your terminal:
scp root@191.162.0.2:/writing/article/scp.zip hostinger@11.10.0.1:/publishing
The command above copies the source file /writing/article/scp.zip from the first host to the second one. To copy folders, use the -r option and specify the folder path instead of the file inside it.
Under normal circumstances, the file will go straight from the first remote server to the second. However, if you want to reroute the operation through your machine, add the -3 option as shown in the following command:
scp -3 root@191.162.0.2:/writing/article/scp.zip hostinger@11.10.0.1:/publishing
Using the SCP Command With Options
The examples above feature several SCP options that modify the command. There are numerous common options in single-character form (-o) and their descriptive equivalent (–option).
The -q parameter, for instance, prompts the system to run the operation in quiet mode. It disables the progress meter output as well as warning and diagnostic messages. Use the -v parameter to enable verbose output for easier debugging:
scp -v /users/Hostinger/desktop/scp.zip root@191.162.0.2
The -4 and -6 options determine the protocol version employed, which is either IPv4 or IPv6. You can also configure IP address requirements more comprehensively with the address-family keyword.
scp -6 root@191.162.0.2:/users/Hostinger/desktop/scp.zip
The -p option preserves modification, access times, and modes from the source file.
scp -p /users/Hostinger/desktop/scp.zip root@191.162.0.2
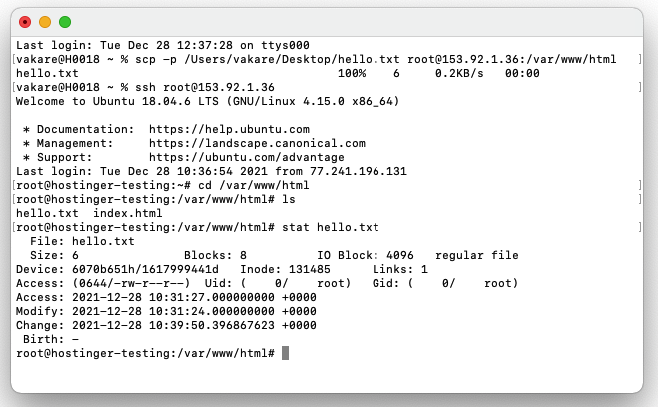
Use the -stat option to check the details of the copied files, such as the date of creation and file size.
The -C option enables data compression for large files or directories while the transfer operation is happening. Keep in mind that this option won't work on compressed files, such as .zip and .rar archives.
scp -C Folder root@191.162.0.2
Not to be confused with -C, the -c option lets you specify the encryption algorithm that the client should use. Some of the values you can enter are 'aes256-ctr', 'aes256-cbc', and '3des-cbc'. The default option in the shell configuration is 'AnyStdCipher'.
scp -c 3des-cbc /users/Hostinger/desktop/scp.zip root@191.162.0.2
Important! Take caution when using SCP options as they're case sensitive.
Conclusion
The secure copy protocol makes transferring files between multiple remote systems on a network easier. It lets you securely copy files from one remote host to another without having to log in via an encrypted connection.
Furthermore, this remote file transfer method encrypts your data with a secure shell, ensuring the confidentiality of the transmitted information.
We hope this article helped you understand how the SCP command works and how to use it on Linux servers properly.
How to Use SCP Command for File Transfer FAQ
How Do I Run SCP on Windows?
You can run SCP on Windows via PuTTY. Use the SCP command via the Windows command line interface. You should start each command line with pscp -scp.
pscp -scp [other options] [source username@IP]:/[directory and file name] [destination username@IP]:/[destination directory]
Can I Pass Password in SCP Command?
You can use a file transfer command:
sshpass -p [password] scp -r /users/Hostinger/desktop root@191.162.0.2:/writing/article
Or enable SSHPASS by generating SSH key pairs. On Windows, PSCP lets you pass the password using the -pw option:
sshpass -pw [password] root@191.162.0.2:/writing/article
How Do I Stop or Pause SCP?
You can pause a process with the "terminal stop" signal (SIGTSTP) by pressing Ctrl+Z. To resume the process, send the SIGCONT signal by typing fg. If SIGCONT doesn't work, use the rsync utility to compare source files or directories with partially uploaded ones, resuming your download indirectly.

Edward is a Content Editor with years of experience in IT as a writer, marketer, and Linux enthusiast. Edward's goal is to encourage readers to establish an impactful online presence. He also really loves dogs, guitars, and everything related to space.

Jordana is a digital marketing and web development enthusiast. When she's not in front of her laptop, you can see her traveling in the search of best sushi.
Source: https://www.hostinger.com/tutorials/using-scp-command-to-transfer-files/
0 Response to "Continuous Scp Copying a File as It is Created"
Post a Comment